반응형

To do List.

1. Client GUI Design


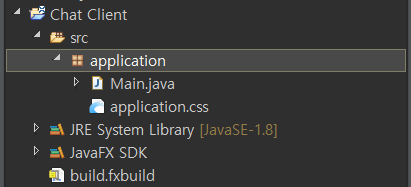
Chat Client 프로젝트의 Main 클래스

package application;

import java.io.IOException;
import java.io.InputStream;
import java.io.OutputStream;
import java.net.Socket;

import javafx.application.Application;
import javafx.application.Platform;
import javafx.geometry.Insets;
import javafx.scene.Scene;
import javafx.scene.control.Button;
import javafx.scene.control.TextArea;
import javafx.scene.control.TextField;
import javafx.scene.layout.BorderPane;
import javafx.scene.layout.HBox;
import javafx.scene.layout.Priority;
import javafx.stage.Stage;

public class Main extends Application {

	Socket socket;
	TextArea textArea;

	// 클라이언트 프로그램 동작 메소드 (어떤 IP로 , 어떤 port로 접속할지 정해줌)
	public void startClient(String IP, int port) {
		// 스레드 객체 생성!
		Thread thread = new Thread() {
			public void run() {
				try {
					// socket 초기화
					socket = new Socket(IP, port);
					receive();
				} catch (Exception e) {
					// 오류가 생긴다면
					if (!socket.isClosed()) {
						stopClient();
						System.out.println("[서버 접속 실패]");
						Platform.exit();
					}
				}
			}
		};
		thread.start();
	}

	// 클라이언트 프로그램 종료 메소드
	public void stopClient() {
		try {
			if(socket != null && !socket.isClosed()) {
				socket.close(); 
			}
		}catch(Exception e){
			e.printStackTrace();
		}
	}

	// 서버로부터 메시지를 전달받는 메소드
	public void receive() {
		// 서버 프로그램으로부터 메시지를 계속 전달 받을 수 있도록
		while (true) {
			try {
				// 서버로부터 메시지를 전달 받을 수 있도록
				InputStream in = socket.getInputStream();
				byte[] buffer = new byte[512];
				int length = in.read(buffer);
				if (length == -1)
					throw new IOException();
				String message = new String(buffer, 0, length, "UTF-8");
				Platform.runLater(() -> {
					// textArea는 GUI요소중 하나로 화면에 어떠한 메시지를 주고 받았는지 출력해 주는 요소.
					textArea.appendText(message);
				});

			} catch (Exception e) {
				stopClient();
				break;
			}
		}
	}

	// 서버로 메시지를 전송하는 메소드
	public void send(String message) {
		Thread thread = new Thread() {
			public void run() {
				try {
					OutputStream out = socket.getOutputStream();
					byte[] buffer = message.getBytes("UTF-8");
					out.write(buffer);
					out.flush();
				} catch (Exception e) {
					stopClient();
				}
			}
		};
		thread.start();
	}

	// 실제로 프로그램을 동작시키는 메서드
	@Override
	public void start(Stage primaryStage) {
		BorderPane root = new BorderPane();
		root.setPadding(new Insets(5));
		
		HBox hbox = new HBox();
		hbox.setSpacing(5);
		
		TextField userName = new TextField();
		userName.setPrefWidth(150);
		userName.setPromptText("닉네임을 입력하세요.");
		HBox.setHgrow(userName, Priority.ALWAYS);
		
		//서버에 ip주소가 들어갈 수 있도록.
		TextField IPText = new TextField("127.0.0.1");
		TextField portText = new TextField("9876");
		portText.setPrefWidth(80);
		
		hbox.getChildren().addAll(userName, IPText, portText);
		root.setTop(hbox);
		
		textArea = new TextArea();
		textArea.setEditable(false);
		root.setCenter(textArea);
		
		TextField input = new TextField();
		input.setPrefWidth(Double.MAX_VALUE);
		input.setDisable(true);
		
		input.setOnAction(event -> {
			send(userName.getText() + ": " + input.getText() + "\n");
			input.setText("");
			input.requestFocus();
		});
		Button sendButton = new Button("보내기");
		sendButton.setDisable(true);
		
		sendButton.setOnAction(event ->{
			send(userName.getText() + " : " + input.getText() + "\n");
			input.setText("");
			input.requestFocus();
		});
		Button connectionButton = new Button("접속하기");
		connectionButton.setOnAction(event -> {
			if(connectionButton.getText().equals("접속하기")) {
				int port = 9876;
				try {
					port = Integer.parseInt(portText.getText());
				}catch(Exception e) {
					e.printStackTrace();
				}
				startClient(IPText.getText(), port);
				Platform.runLater(() -> {
					textArea.appendText("[채팅방접속]\n");
				});
				connectionButton.setText("종료하기");
				input.setDisable(false);
				input.requestFocus();
				
			}else {
				stopClient();
				Platform.runLater(() ->{
					textArea.appendText("[채팅방 퇴장]");
				});
				connectionButton.setText("접속하기");
				input.setDisable(true);
				sendButton.setDisable(true);
			}
		});
		BorderPane pane = new BorderPane();
		pane.setLeft(connectionButton);
		pane.setCenter(input);
		pane.setRight(sendButton);
		
		root.setBottom(pane);
		Scene scene = new Scene(root, 500, 500);
		primaryStage.setTitle(" [채팅 클라이언트] ");
		primaryStage.setScene(scene);
		primaryStage.setOnCloseRequest(event -> stopClient());
		primaryStage.show();
		
		connectionButton.requestFocus();
		
	}

	// 프로그램의 진입점.
	public static void main(String[] args) {
		launch(args);
	}
}

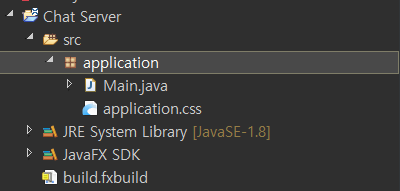
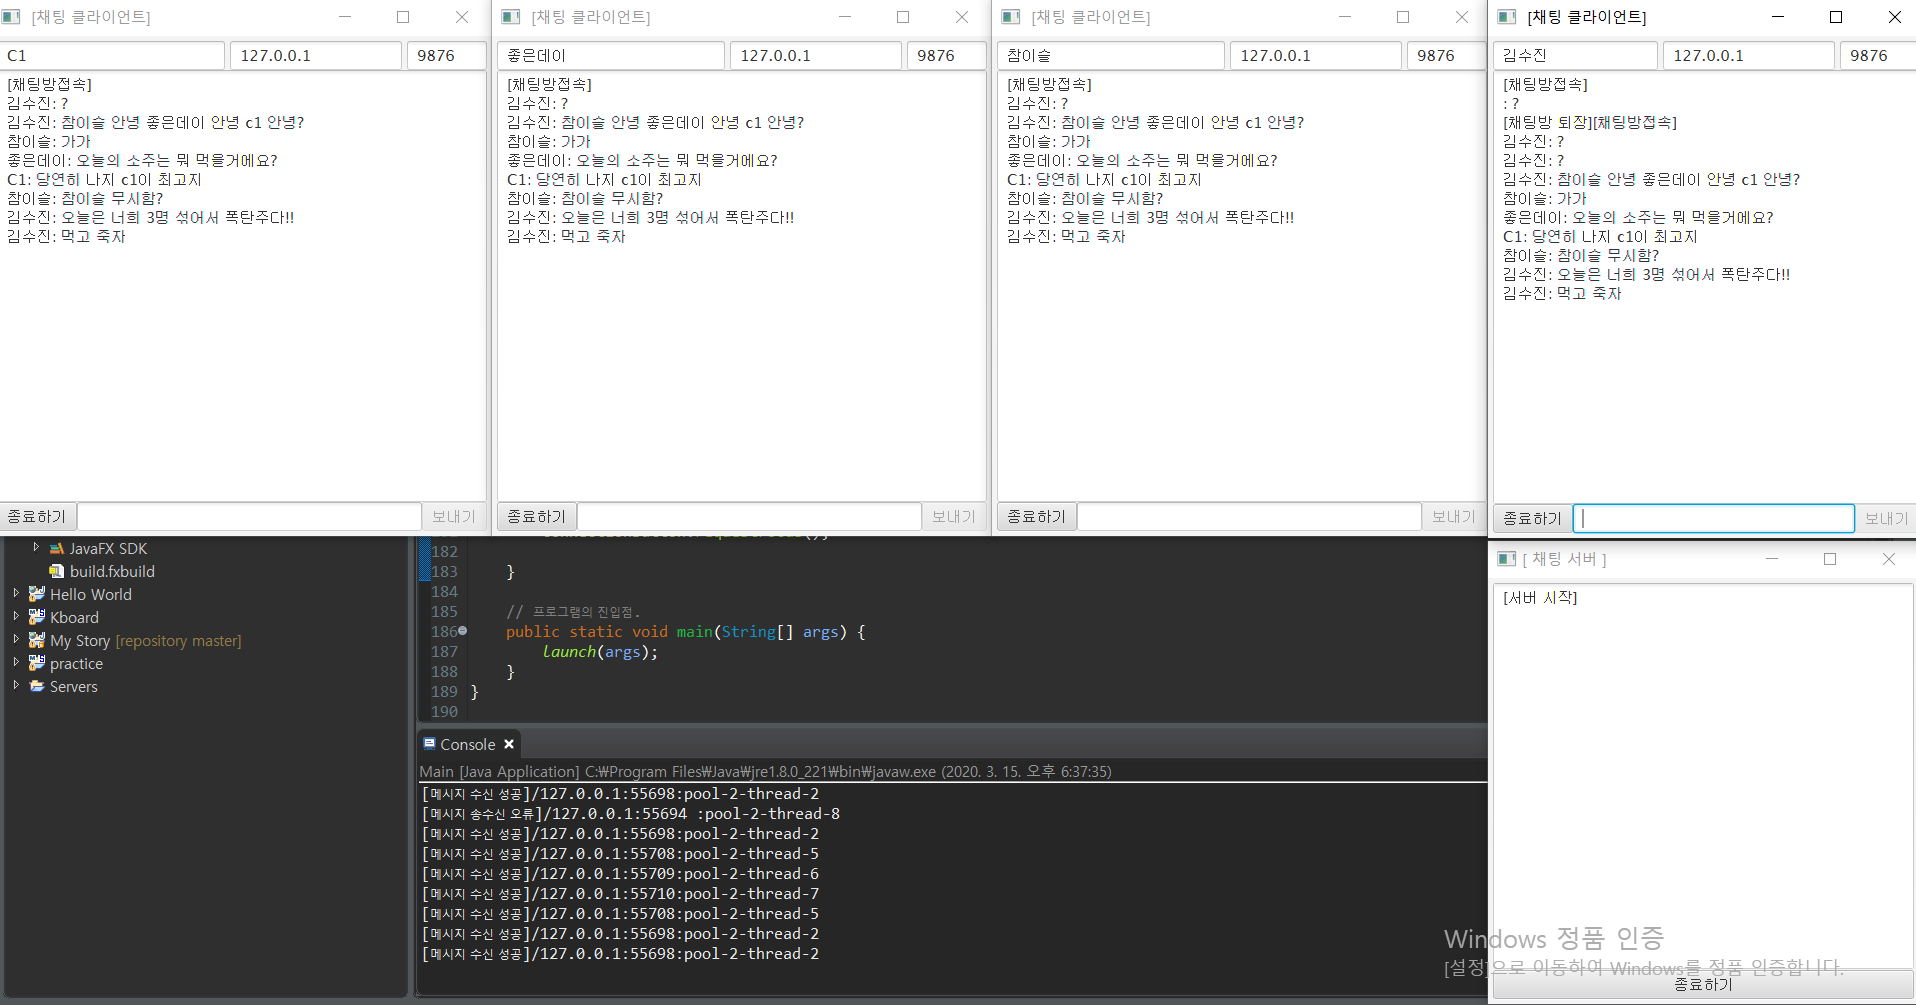
chat server 프로젝트에서 Main 을 실행하고

chat client 프로젝트에서 Main을 실행합니다.

server 에서 접속하기를 누른후

client 여러개를 실행하여 접속하기를 누릅니다.

그러면 접속이 되고 실시간으로 채팅을 주고 받을 수 있습니다.


반응형
블로그 이미지

꽃꽂이하는개발자

,
반응형

클라이언트 기능 모듈 개발하기!

1. 채팅 서버를 만든 것 처럼 이클립스에서 new -> other -> javaFx검색 -> javaFxProject를 만듭니다.

2. Main class를 작성합니다.

package application;

import java.io.IOException;
import java.io.InputStream;
import java.io.OutputStream;
import java.net.Socket;

import javafx.application.Application;
import javafx.application.Platform;
import javafx.scene.control.TextArea;
import javafx.stage.Stage;

public class Main extends Application {

	Socket socket;
	TextArea textArea;

	// 클라이언트 프로그램 동작 메소드 (어떤 IP로 , 어떤 port로 접속할지 정해줌)
	public void startClient(String IP, int port) {
		// 스레드 객체 생성!
		Thread thread = new Thread() {
			public void run() {
				try {
					// socket 초기화
					socket = new Socket(IP, port);
					receive();
				} catch (Exception e) {
					// 오류가 생긴다면
					if (!socket.isClosed()) {
						stopClient();
						System.out.println("[서버 접속 실패]");
						Platform.exit();
					}
				}
			}
		};
		thread.start();
	}

	// 클라이언트 프로그램 종료 메소드
	public void stopClient() {
		try {
			if(socket != null && !socket.isClosed()) {
				socket.close(); 
			}
		}catch(Exception e){
			e.printStackTrace();
		}
	}

	// 서버로부터 메시지를 전달받는 메소드
	public void receive() {
		// 서버 프로그램으로부터 메시지를 계속 전달 받을 수 있도록
		while (true) {
			try {
				// 서버로부터 메시지를 전달 받을 수 있도록
				InputStream in = socket.getInputStream();
				byte[] buffer = new byte[512];
				int length = in.read(buffer);
				if (length == -1)
					throw new IOException();
				String message = new String(buffer, 0, length, "UTF-8");
				Platform.runLater(() -> {
					// textArea는 GUI요소중 하나로 화면에 어떠한 메시지를 주고 받았는지 출력해 주는 요소.
					textArea.appendText(message);
				});

			} catch (Exception e) {
				stopClient();
				break;
			}
		}
	}

	// 서버로 메시지를 전송하는 메소드
	public void send(String message) {
		Thread thread = new Thread() {
			public void run() {
				try {
					OutputStream out = socket.getOutputStream();
					byte[] buffer = message.getBytes("UTF-8");
					out.write(buffer);
					out.flush();
				} catch (Exception e) {
					stopClient();
				}
			}
		};
		thread.start();
	}

	// 실제로 프로그램을 동작시키는 메서드
	@Override
	public void start(Stage primaryStage) {
	}

	// 프로그램의 진입점.
	public static void main(String[] args) {
		launch(args);
	}
}
반응형
블로그 이미지

꽃꽂이하는개발자

,
반응형

서버 GUI 디자인 작업하기

package application;
	
import java.net.InetSocketAddress;
import java.net.ServerSocket;
import java.net.Socket;
import java.util.Iterator;
import java.util.Vector;
import java.util.concurrent.ExecutorService;
import java.util.concurrent.Executors;

import javafx.application.Application;
import javafx.application.Platform;
import javafx.geometry.Insets;
import javafx.scene.Scene;
import javafx.scene.control.Button;
import javafx.scene.control.TextArea;
import javafx.scene.layout.BorderPane;
import javafx.scene.text.Font;
import javafx.stage.Stage;


public class Main extends Application {
	
	//스레드 풀 사용(한정된 자원으로 안정적이게 서버를 운용하기 위해서 threadPool 기법을 사용합니다.)
	public static ExecutorService threadPool;
	//접속한 클라이언트들을 관리 할수 있도록 만듬.
	public static Vector<Client> clients = new Vector<Client>();
	//서버 소켓 생성
	ServerSocket serverSocket;
	//서버를 구동시켜 클라이언트의 연결을 기다리는 메소드.
	public void startServer(String IP, int port) {
		try {
			serverSocket = new ServerSocket();
			//특정한 ip번호와 port번호로 특정한 클라이언트에게 접속을 기다리게 해줌
			serverSocket.bind(new InetSocketAddress(IP, port));
		}catch(Exception e) {
			e.printStackTrace();
			//서버 소켓이 닫혀있는 경우가 아니라면 
			if(!serverSocket.isClosed()) {
				stopServer();//서버를 종료
			}
			return;
		}
		// 클라이언트가 접속할 때 까지 계속 기다리는 스레드.
		Runnable thread = new Runnable() {

			@Override
			public void run() {
				//계속해서 새로운 클라이언트가 접속 할 수 있도록 해줌
				while(true) {
					try {
						Socket socket = serverSocket.accept();
						clients.add(new Client(socket));
						System.out.println(" [클라이언트 접속] "
								+ socket.getRemoteSocketAddress()
								+ " :" + Thread.currentThread().getName());
					}catch(Exception e) {
						//   서버 소켓에 문제가 생긴거니 서버를 종료 시키고 break문을 활용해서 빠져나갑니다.
						if(!serverSocket.isClosed()) {
							stopServer();
						}
						break;
					}
				}
			}
			
		};
		//스레드 풀을 초기화
		threadPool = Executors.newCachedThreadPool();
		//클라이언트에 접속을 원하는 스레드를 넣어줍니다. 
		threadPool.submit(thread);
	}
	//서버의 작동을 중지시켜주는 메소드
	public void stopServer() {
		try {
			//현재 작업중인 모든 소켓 닫기
			Iterator<Client> iterator = clients.iterator();
			//한명 한명의 클라이언트에게 접근
			while(iterator.hasNext()) {
				Client client = iterator.next();
				client.socket.close();
				iterator.remove();
			}
			//서버 소켓 객체 닫기
			if(serverSocket != null && !serverSocket.isClosed()) {
				serverSocket.close();
				
			}
			//스레드풀 종료
			if(threadPool != null && !threadPool.isShutdown()) {
				threadPool.shutdown();
			}
		}catch(Exception e){
			e.printStackTrace();
		}
	}
	
	//UI를 생성하고 , 실질적으로 프로그램을 동작시키는 메서드
	@Override
	public void start(Stage primaryStage) {
		//하나의 전체 디자인 틀을 담을 수 있는 하나의 펜을 생성 
		BorderPane root = new BorderPane();
		//내부 페이딩 5
		root.setPadding(new Insets(5));
		
		TextArea textArea = new TextArea();
		textArea.setEditable(false);
		textArea.setFont(new Font("나눔고딕", 15));
		root.setCenter(textArea);
		
		//토글 버튼은 스위치라고 생각하시면 됨.
		Button toggleButton = new Button("시작하기");
		toggleButton.setMaxWidth(Double.MAX_VALUE);
		BorderPane.setMargin(toggleButton, new Insets(1, 0, 0, 0));
		root.setBottom(toggleButton);
		
		//자신의 로컬 서버
		String IP = "127.0.0.1";
		int port = 9876;
		
		toggleButton.setOnAction(event -> {
			if(toggleButton.getText().equals("시작하기")) {
				startServer(IP, port);
				//자바 fx같은 경우는 바로 textArea에 쓰면 안되고 runLator와 같은 함수를 이용하여 어떠한 gui요소를 출력할 수 있도록 해야함.
				Platform.runLater(() -> {
					String message = String.format("[서버 시작]\n", IP, port);
					textArea.appendText(message);
					toggleButton.setText("종료하기");
				});
			}else {
				stopServer();
				Platform.runLater(() -> {
					String message = String.format("[서버 종료]\n", IP, port);
					textArea.appendText(message);
					toggleButton.setText("시작하기");
				});
			}
		});
		//크기
		Scene scene = new Scene(root, 500, 500);
		primaryStage.setTitle("[ 채팅 서버 ]");
		primaryStage.setOnCloseRequest(event -> stopServer());
		primaryStage.setScene(scene);
		primaryStage.show();
	}


	//프로그램의 메인 메서드
	public static void main(String[] args) {
		launch(args);
	}
}

public void start 함수 작성함

# 모든 import 는 javafx로 합니다.

# 혹시 아래와 같은 에러가 뜨신다면 글 확인해주세요.

2020/03/15 - [IT Q_A] - java.net.BindException: Cannot assign requested address: JVM_Bind


반응형
블로그 이미지

꽃꽂이하는개발자

,
반응형

Client 클래스

package application;

import java.io.IOException;
import java.io.InputStream;
import java.io.OutputStream;
import java.net.Socket;

//한명의 클라이언트와 통신하게 해주는 클래스 입니다.
public class Client {
	
		//소켓이 있어야지 클라이언트와 네트워크상에서 통신할 수 있음.
		Socket socket;
		
		//생성자 생성
		public Client(Socket socket) {
			this.socket = socket;
			
			//반복적으로 클라이언트로부터 메시지를 전달받을 수 있도록 receive()함수를 만듬.
			receive();
		}
		
		//클라이언트로부터 메시지를 전달받는 메소드.
		public void receive() {
			//작업 생성은 Runnable 인터페이스 or Callable 인터페이스를 구현한 클래스로 작업요청할 코드를 삽입해 작업을 만들 수 있습니다.
			//둘의 차이점은 Runnable의 run() 메서드는 리턴값이 없고, Callable의 call() 메서드는 리턴 값이 있습니다.
			Runnable thread = new Runnable() {
				@Override
				public void run() {
					try {
						//반복적으로 클라이언드에게 내용을 받을 수 있도록  while문 생성
						while(true) {
							//어떤 내용을 전달 받을 수 있도록 inputstream객체 사용
							InputStream in = socket.getInputStream();
							//버퍼를 사용해서 한번에 512byte까지 받을 수 있도록 설정
							byte[] buffer = new byte[512];
							//메시지의 크기
							int length = in.read(buffer);
							while(length == -1) throw new IOException();
							//서버에 접속을 한 클라이언트의 주소정보 출력, 스레드의 이름값을 출력, 
							System.out.println("[메시지 수신 성공]"
									+ socket.getRemoteSocketAddress()
									+ ":" + Thread.currentThread().getName());
							//전달받은 값을 한글도 포함 할 수 있도록 UTF-8 설정
							String message = new String(buffer, 0, length, "UTF-8");
							//전달받은 메시지를 다른 클라이언트들에게 보낼 수 있도록 만들어 줍니다.
							for(Client client : Main.clients) {
								client.send(message);
							}
						}
						
					}catch(Exception e){
						try {
							System.out.println(" [메시지 수신 오류]"
							+ socket.getRemoteSocketAddress()
							+ " : " + Thread.currentThread().getName());
						}catch(Exception e2){
							e2.printStackTrace();
						}
					}
				}
				
			};
			//메인함수에 있는 스레드풀에 섭밋을 해줍니다.
			//즉 스레드풀에 만들어진 하나의 스레드를 등록
			Main.threadPool.submit(thread);
		}
		
		//클라이언트에게 메시지를 전송하는 메소드.
		public void send(String message) {
			Runnable thread = new Runnable() {

				@Override
				public void run() {
					try {
						OutputStream out = socket.getOutputStream();
						byte[] buffer = message.getBytes("UTF-8");
						//버퍼에 담긴 내용을 서버에서 클라이언트에게 전송
						out.write(buffer);
						out.flush();
					}catch(Exception e){
						try {
							System.out.println("[메시지 송수신 오류]" 
									+ socket.getRemoteSocketAddress()
									+ " :" + Thread.currentThread().getName());
								Main.clients.remove(Client.this);
								socket.close();
						}catch(Exception e2) {
							e2.printStackTrace();
						}
					}
					
				}
				
			};
			Main.threadPool.submit(thread);
		}
		
}

Main class

package application;
	
import java.net.InetSocketAddress;
import java.net.ServerSocket;
import java.net.Socket;
import java.util.Iterator;
import java.util.Vector;
import java.util.concurrent.ExecutorService;
import java.util.concurrent.Executors;

import javafx.application.Application;
import javafx.stage.Stage;


public class Main extends Application {
	
	//스레드 풀 사용(한정된 자원으로 안정적이게 서버를 운용하기 위해서 threadPool 기법을 사용합니다.)
	public static ExecutorService threadPool;
	//접속한 클라이언트들을 관리 할수 있도록 만듬.
	public static Vector<Client> clients = new Vector<Client>();
	//서버 소켓 생성
	ServerSocket serverSocket;
	//서버를 구동시켜 클라이언트의 연결을 기다리는 메소드.
	public void startServer(String IP, int port) {
		try {
			serverSocket = new ServerSocket();
			//특정한 ip번호와 port번호로 특정한 클라이언트에게 접속을 기다리게 해줌
			serverSocket.bind(new InetSocketAddress(IP, port));
		}catch(Exception e) {
			e.printStackTrace();
			//서버 소켓이 닫혀있는 경우가 아니라면 
			if(!serverSocket.isClosed()) {
				stopServer();//서버를 종료
			}
			return;
		}
		// 클라이언트가 접속할 때 까지 계속 기다리는 스레드.
		Runnable thread = new Runnable() {

			@Override
			public void run() {
				//계속해서 새로운 클라이언트가 접속 할 수 있도록 해줌
				while(true) {
					try {
						Socket socket = serverSocket.accept();
						clients.add(new Client(socket));
						System.out.println(" [클라이언트 접속] "
								+ socket.getRemoteSocketAddress()
								+ " :" + Thread.currentThread().getName());
					}catch(Exception e) {
						//   서버 소켓에 문제가 생긴거니 서버를 종료 시키고 break문을 활용해서 빠져나갑니다.
						if(!serverSocket.isClosed()) {
							stopServer();
						}
						break;
					}
				}
			}
			
		};
		//스레드 풀을 초기화
		threadPool = Executors.newCachedThreadPool();
		//클라이언트에 접속을 원하는 스레드를 넣어줍니다. 
		threadPool.submit(thread);
	}
	//서버의 작동을 중지시켜주는 메소드
	public void stopServer() {
		try {
			//현재 작업중인 모든 소켓 닫기
			Iterator<Client> iterator = clients.iterator();
			//한명 한명의 클라이언트에게 접근
			while(iterator.hasNext()) {
				Client client = iterator.next();
				client.socket.close();
				iterator.remove();
			}
			//서버 소켓 객체 닫기
			if(serverSocket != null && !serverSocket.isClosed()) {
				serverSocket.close();
				
			}
			//스레드풀 종료
			if(threadPool != null && !threadPool.isShutdown()) {
				threadPool.shutdown();
			}
		}catch(Exception e){
			e.printStackTrace();
		}
	}
	
	//UI를 생성하고 , 실질적으로 프로그램을 동작시키는 메서드
	@Override
	public void start(Stage primaryStage) {
	}
	
	//프로그램의 메인 메서드
	public static void main(String[] args) {
		launch(args);
	}
}


다음 글에서 계속 하겠습니다.

반응형
블로그 이미지

꽃꽂이하는개발자

,
반응형


1. 자신의 운영체제에 맞는 Java FX Scene Buler을 설치해 줍니다.

https://www.oracle.com/java/technologies/javafxscenebuilder-1x-archive-downloads.html


JavaFX Scene Builder 1.x Archive

No results found Your search did not match any results. We suggest you try the following to help find what you're looking for: Check the spelling of your keyword search. Use synonyms for the keyword you typed, for example, try “application” instead of “sof

www.oracle.com

2. eclipse의 help -> Market Place -> java fx 검색후 설치를 해줍니다.


3.  이제 프로젝트를 만들어 줍니다. 마우스 오른쪽 클릭해서 new-> other ->javafx검색->JavaFX Project생성

저는 Chat Server 이란 이름으로 만들어 주었습니다.

그 후에 application 패키지 내에 Client라는 Class를 생성해 주겠습니다.

Client 클래스

package application;

import java.net.Socket;

//한명의 클라이언트와 통신하게 해주는 클래스 입니다.
public class Client {
	
		//소켓이 있어야지 클라이언트와 네트워크상에서 통신할 수 있음.
		Socket socket;
		
		//생성자 생성
		public Client(Socket socket) {
			this.socket = socket;
			
			//반복적으로 클라이언트로부터 메시지를 전달받을 수 있도록 receive()함수를 만듬.
			receive();
		}
		
		//클라이언트로부터 메시지를 전달받는 메소드.
		public void receive() {
			
		}
		
		//클라이언트에게 메시지를 전송하는 메소드.
		public void send(String message) {
			
		}
		
}


다음으로 Main class로 가서 입력해 줍니다.

package application;
	
import java.net.ServerSocket;
import java.util.Vector;
import java.util.concurrent.ExecutorService;

import javafx.application.Application;
import javafx.stage.Stage;


public class Main extends Application {
	
	//스레드 풀 사용(한정된 자원으로 안정적이게 서버를 운용하기 위해서 threadPool 기법을 사용합니다.)
	public static ExecutorService threadPool;
	//접속한 클라이언트들을 관리 할수 있도록 만듬.
	public static Vector<Client> client = new Vector<Client>();
	//서버 소켓 생성
	ServerSocket serverSocekt;
	//서버를 구동시켜 클라이언트의 연결을 기다리는 메소드.
	public void startServer(String IP, int port) {
		
	}
	//서버의 작동을 중지시켜주는 메소드
	public void stopServer() {
		
	}
	
	//UI를 생성하고 , 실질적으로 프로그램을 동작시키는 메서드
	@Override
	public void start(Stage primaryStage) {
	}
	
	//프로그램의 메인 메서드
	public static void main(String[] args) {
		launch(args);
	}
}


기본적인 함수들을 만들어 주었습니다.

다음 글로 넘어가겠습니다.


반응형
블로그 이미지

꽃꽂이하는개발자

,