


JDBC는 자바 데이터 접근 기술의 근간이라 할 정도로 대부분의 개발자가 쉽게 이해할 수 있어 많이 사용하는 데이터 액세스 기술입니다. 그러나 시간이 지남에 따라 SQL문이 지나치게 복잡해지면서 개발이나 유지관리에 어려움이 생기기 시작했습니다. 특히 cONNECTION 객체 같은 공유 리소스를 제대로 처리해주지 않으면 버그를 발생시키는 원인이 되곤 했습니다.
스프링에서 제공하는 JDBC는 이러한 기존 JDBC의 장점과 단순함을 유지하면서 단점을 보완했습니다. 간결한 API뿐만 아니라 확장된 JDBC의 기능도 제공합니다.
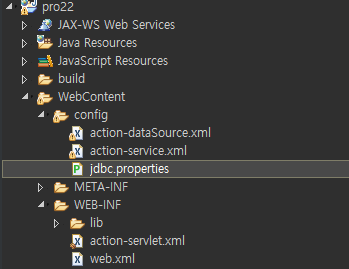
이번에 사용할 파일들 입니다.
lib 폴더와 action-servlet.xml , web.xml은 이 전글에서 했던 것들을 가져와 재사용 하겠습니다.
| 파일 | 설명 |
| web.xml | ContextLoaderListener를 이용해 빈 설정 XML 파일들을 읽어 들입니다. |
| action-servlet.xml | 스프링에서 필요한 여러 가지 빈을 설정합니다. |
| action-dataSource.xml | 스프링 JDBC 설정에 필요한 정보를 설정합니다. |
| jdbc.properties | 데이터베이스 연결정보를 저장합니다. |
| action-service.xml | 서비스 빈 생성을 설정합니다. |
1. action-servlet.xml과 action-dataSource.xml의 <beans> 태그는 이전 글에서 실습한 action-servlet.xml의 것을 복사해 붙여 넣겠습니다.
<beans xmlns="http://www.springframework.org/schema/beans"
	xmlns:p="http://www.springframework.org/schema/p"
	xmlns:aop="http://www.springframework.org/schema/aop"
	xmlns:context="http://www.springframework.org/schema/context"
	xmlns:xsi="http://www.w3.org/2001/XMLSchema-instance"
	xsi:schemaLocation="http://www.springframework.org/schema/beans
http://www.springframework.org/schema/beans/spring-beans-3.0.xsd
http://www.springframework.org/schema/aop
http://www.springframework.org/schema/aop/spring-aop-3.0.xsd
http://www.springframework.org/schema/context
http://www.springframework.org/schema/context/spring-context-3.0.xsd">
2. web.xml을 다음과 같이 작성합니다. 한 개의 XML 파일에서 모든 빈을 설정하면 복잡해서 관리하기 어려우므로 빈의 종류에 따라 XML 파일에 나누어 설정합니다. 그러면 톰캣 실행시 web.xml에서 스프링의 ContextLoaderListener를 이용해 빈 설정 XML 파일들을 읽어 들입니다.
<?xml version="1.0" encoding="UTF-8"?>
<web-app xmlns:xsi="http://www.w3.org/2001/XMLSchema-instance" xmlns="http://xmlns.jcp.org/xml/ns/javaee"
xsi:schemaLocation="http://xmlns.jcp.org/xml/ns/javaee http://xmlns.jcp.org/xml/ns/javaee/web-app_3_1.xsd"
id="WebApp_ID" version="3.1">

	<!-- 여러 설정 파일을 읽어 들이기 위해 스프링의 ContextLoaderListener를 설정합니다. -->
	<listener>
		<listener-class>
			org.springframework.web.context.ContextLoaderListener
		</listener-class>
	</listener>


	<context-param>
		<param-name>contextConfigLocation</param-name>
		<param-value>
			<!-- 애플리케이션 실행 시 ContextLoaderListener로 해당 위치의 설정 파일을 읽어 들입니다. -->
			/WEB-INF/config/action-service.xml
			/WEB-INF/config/action-dataSource.xml
		</param-value>
	</context-param>


	<servlet>
		<servlet-name>action</servlet-name>
		<servlet-class>org.springramework.web.servlet.DispatcherServlet</servlet-class>
		<load-on-startup>1</load-on-startup>
	</servlet>

	<servlet-mapping>
		<servlet-name>action</servlet-name>
		<url-pattern>*.do</url-pattern>
	</servlet-mapping>

</web-app>
3. action-servlet.xml을 다음과 같이 작성합니다. 여기서는 뷰 관련 빈과 요청을 처리할 빈 그리고 메서드를 설정합니다. 이때 주의할 점은 빈 주입 시 주입 받는 클래스에서는 주입되는 빈에 대한 setter를 반드시 구현해야 한다는 것입니다.
<?xml version="1.0" encoding="UTF-8" ?>
<beans xmlns="http://www.springframework.org/schema/beans"
	xmlns:p="http://www.springframework.org/schema/p"
	xmlns:aop="http://www.springframework.org/schema/aop"
	xmlns:context="http://www.springframework.org/schema/context"
	xmlns:xsi="http://www.w3.org/2001/XMLSchema-instance"
	xsi:schemaLocation="http://www.springframework.org/schema/beans
http://www.springframework.org/schema/beans/spring-beans-3.0.xsd
http://www.springframework.org/schema/aop
http://www.springframework.org/schema/aop/spring-aop-3.0.xsd
http://www.springframework.org/schema/context
http://www.springframework.org/schema/context/spring-context-3.0.xsd">


 	<bean id="viewResolver"
		class="org.springframework.web.servlet.view.InternalResourceViewResolver">
		<property name="viewClass"
			value="org.springframework.web.servlet.view.JstlView" />
		<property name="prefix" value="/WEB-INF/views/" />
		<property name="suffix" value=".jsp" />
	</bean>

	<bean id="memberController"
		class="com.spring.member.controller.MemberControllerImpl">
		<property name="methodNameResolver">
			<ref local="methodResolver" />
		</property>
		<property name="memberService" ref="memberService" />
	</bean>

	<bean  id="methodResolver"
   class="org.springframework.web.servlet.mvc.multiaction.PropertiesMethodNameResolver" >
      <property  name="mappings" >
        <props>
          <prop key="/member/listMembers.do" >listMembers</prop>
          <prop key="/member/addMember.do" >addMember</prop>
          <prop key="/member/memberForm.do" >memberForm</prop>
          <prop key="/member/memberDetail.do">memberDetail</prop>
       </props>
      </property>
   </bean>

	<bean id="urlMapping"
		class="org.springframework.web.servlet.handler.SimpleUrlHandlerMapping" >
		<property name="mappings" >
			<props>
				<prop key="/member/*.do">memberController</prop>
			</props>
		</property>
	</bean>

</beans>
4. action-service.xml에서 memberService 빈을 설정하도록 작성합니다. 데이터베이스와 연동할 때 필요한 memberDAO 빈을 주입하는 기능을 합니다.
<?xml version="1.0" encoding="UTF-8"?>
<beans xmlns="http://www.springframework.org/schema/beans"
	xmlns:p="http://www.springframework.org/schema/p"
	xmlns:aop="http://www.springframework.org/schema/aop"
	xmlns:context="http://www.springframework.org/schema/context"
	xmlns:xsi="http://www.w3.org/2001/XMLSchema-instance"
	xsi:schemaLocation="http://www.springframework.org/schema/beans
http://www.springframework.org/schema/beans/spring-beans-3.0.xsd
http://www.springframework.org/schema/aop
http://www.springframework.org/schema/aop/spring-aop-3.0.xsd
http://www.springframework.org/schema/context
http://www.springframework.org/schema/context/spring-context-3.0.xsd">

	<bean id="memberService" class="com.spring.member.service.MemberServiceImpl">
		<!-- memberService 빈의 memberDAO 속성에 memberDAO 빈을 주입합니다. -->
		<property name="memberDAO" ref="memberDAO" />
	</bean>
</beans>
5. 다음으로 action-dataSource.xml을 작성합니다. 이 파일은 스프링에서 사용할 데이터베이스 연동 정보를 설정합니다. 먼저 jdbc.properties 파일에서 데이터베이스 연결 정보를 가져온 후 이 연결 정보를 이용해 스프링에서 제공하는 SimpleDriverDataSource로 id가 dataSource인 빈을 생성합니다. 그리고 dataSource 빈을 memberDAO 빈으로 주입합니다.
<?xml version="1.0" encoding="UTF-8"?>
<beans xmlns="http://www.springframework.org/schema/beans"
	xmlns:p="http://www.springframework.org/schema/p"
	xmlns:aop="http://www.springframework.org/schema/aop"
	xmlns:context="http://www.springframework.org/schema/context"
	xmlns:xsi="http://www.w3.org/2001/XMLSchema-instance"
	xsi:schemaLocation="http://www.springframework.org/schema/beans
http://www.springframework.org/schema/beans/spring-beans-3.0.xsd
http://www.springframework.org/schema/aop
http://www.springframework.org/schema/aop/spring-aop-3.0.xsd
http://www.springframework.org/schema/context
http://www.springframework.org/schema/context/spring-context-3.0.xsd">


	<bean id="propertyConfigurer" class="org.springframework.beans.factory.config.PropertyPlaceholderConfigurer" >
		<property name="locations">
			<list>
				<!-- jdbc.properties 파일에서 데이터베이스 연결에 필요한 4가지 설정 정보를 가져옵니다. -->
				<value> /WEB-INF/config/jdbc.properties</value>
			</list>
		</property>
	</bean>

	<bean id="dataSource" class="org.springframework.jdbc.datasource.SimpleDriverDataSource">
		<property name="driverClass" value="${jdbc.driverClassName}" />
		<property name="url" value="${jdbc.url}" />
		<property name="username" value="${jdbc.username}" />
		<property name="password" value="${jdbc.password}" />
	</bean>

	<!-- 생성된 dataSource 빈을 memberDAO 빈에 주입합니다. -->
	<bean id="memberDAO" class="com.spring.member.dao.MemberDAOImpl">
		<property name="dataSource" ref="dataSource" />
	</bean>

</beans>
6. jdbc.properties 파일에서는 데이터베이스 연결정보를 작성합니다.
jdbc.driverClassName=oracle.jdbc.driver.OracleDriver
jdbc.url=jdbc:oracle:thin:@localhost:1521:XE
jdbc.username=scott
jdbc.password=scott
다음글에서는 jdbcTemplate 클래스를 이용해 회원 정보를 조회해 보겠습니다.
'2020 > SPRING' 카테고리의 다른 글
| @Configuration, @Bean, @Component, @Autowired (0) | 2020.01.30 |
|---|---|
| JdbcTemplate 클래스 이용해 회원정보 조회 실습 (0) | 2020.01.09 |
| MultiActionController 이용해 회원 정보 표시 (0) | 2020.01.08 |
| MultiActionController 스프링 MVC 실습 (0) | 2020.01.08 |
| SimpleUrlController 이용해 스프링 MVC 실습하기 (0) | 2020.01.08 |

꽃꽂이하는개발자